Enigma of the Labyrinth Gameplay Guide: Maps, Items, Supplies, and Exploration
Enigma of the Labyrinth adds an extraction-style exploration system to Zenless Zone Zero Version 3.1, where knowing the map, managing supplies, and reaching an Evacuation Anchor safely matter as much as winning battles. The permanent mode became available after August 5, 2026, at 10:00 server time, and its map and item systems form the core of each Hollow investigation.
In this mode, Proxies enter the Hollow to collect supplies, complete commissions, find valuable items, and return to the Omond Research Station. The key point is that exploration carries risk: unsecured items can be lost if the investigation ends badly.
Enigma of the Labyrinth Maps and Areas
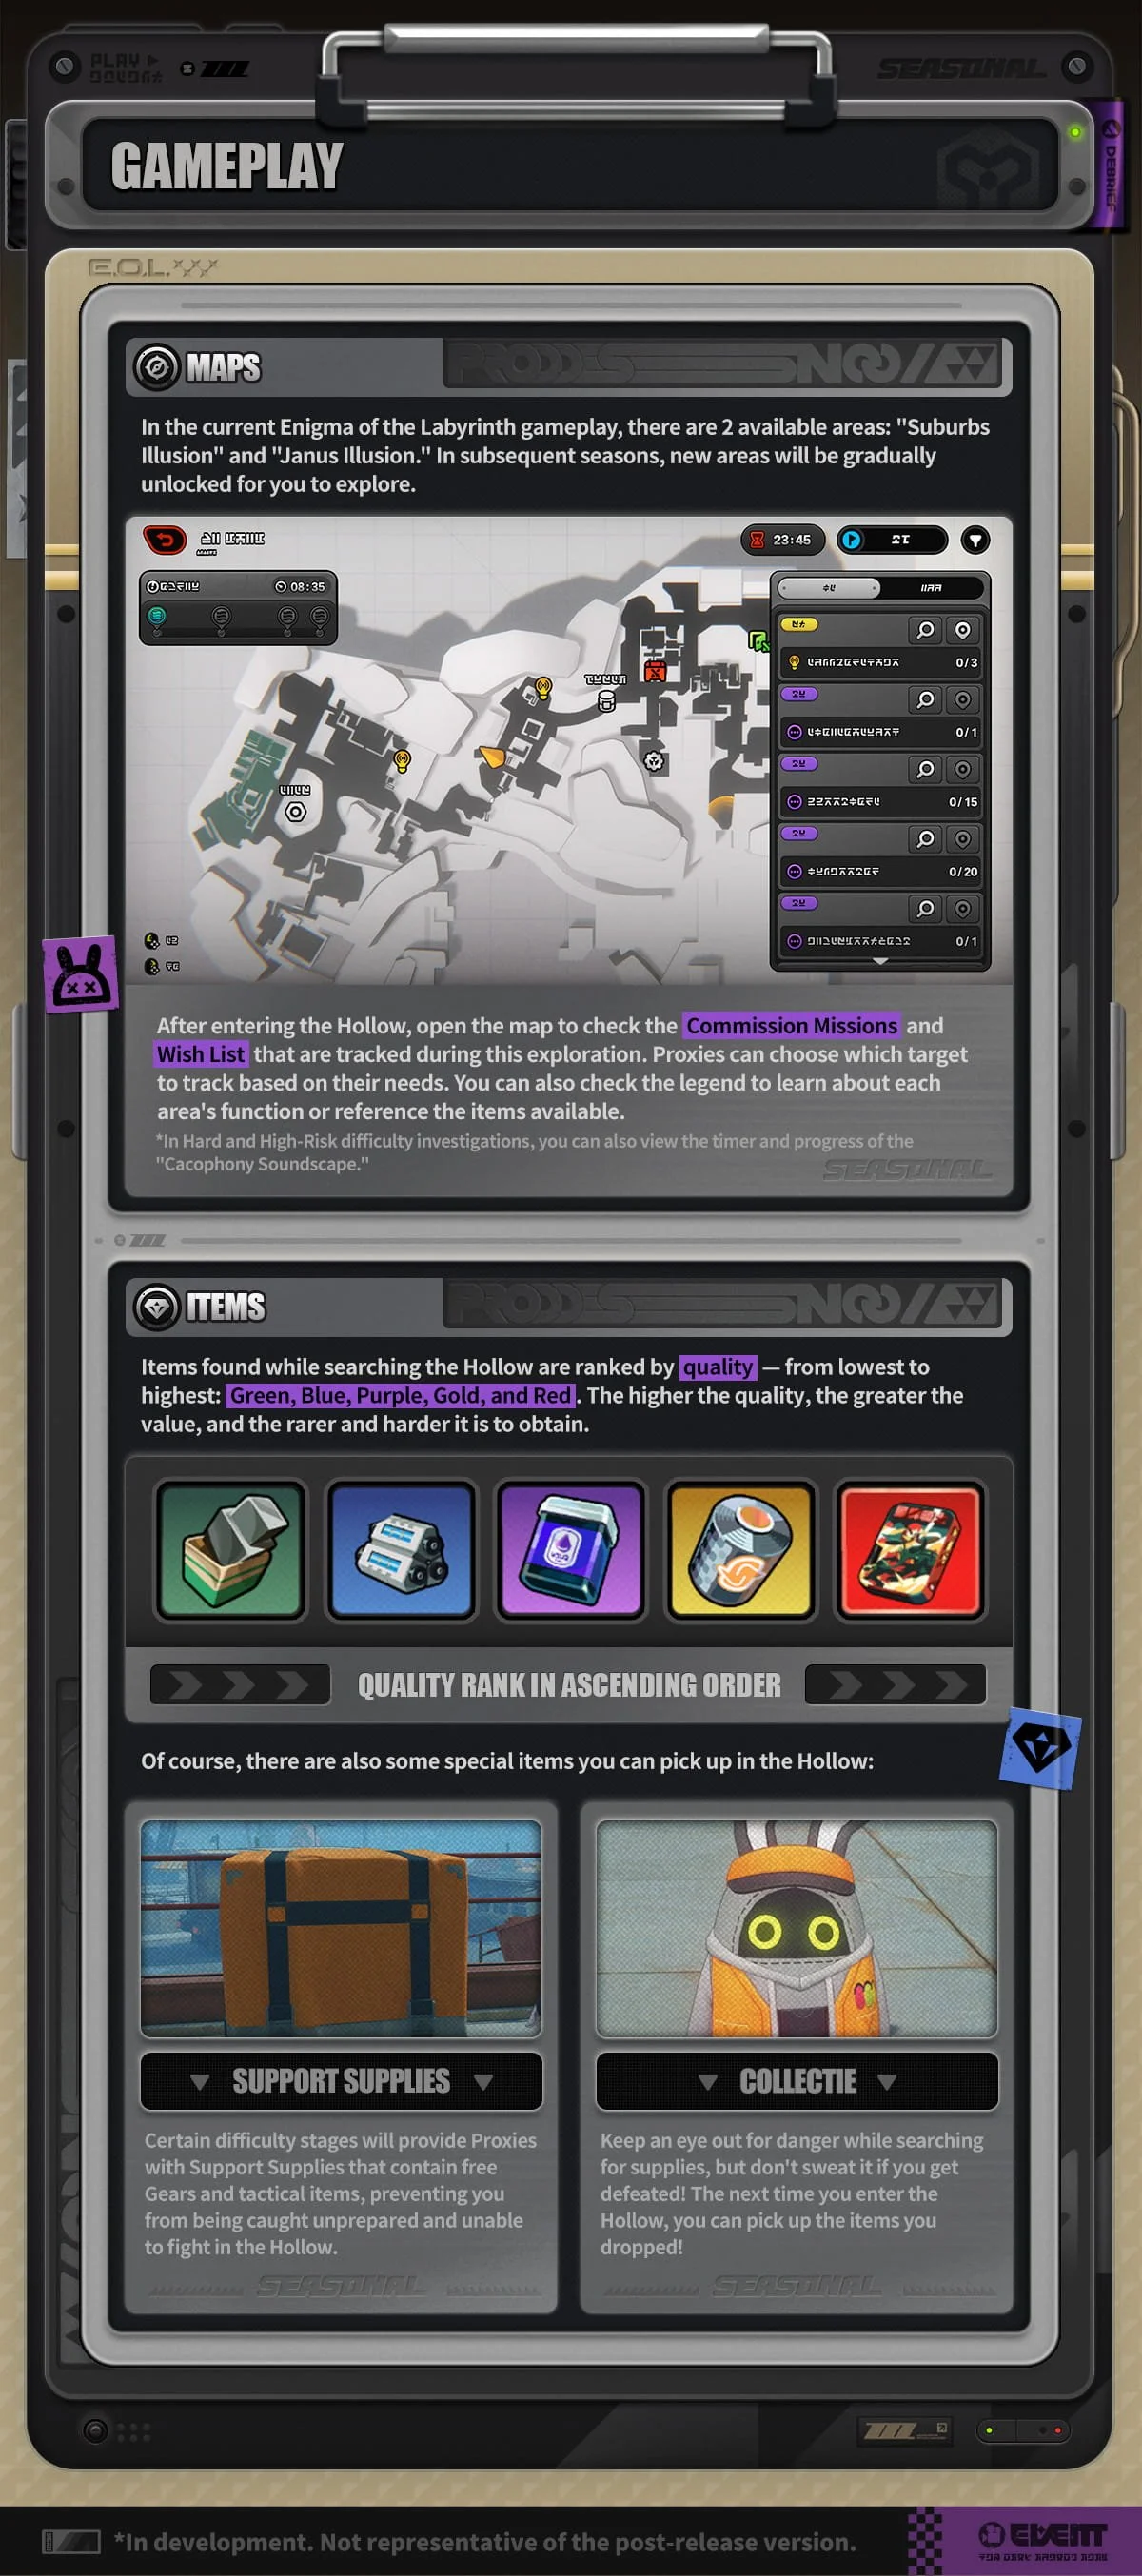
The map system helps you track missions, Wishlist targets, available areas, and Evacuation Anchors during each investigation. The first Season provides access to Suburbs Illusion and Janus Illusion, while additional areas become available as later Seasons open up.
After completing the tutorial, you can return to the Omond Research Station and use the Enigma menu to select “To Hollow”. From there, you choose an available area before starting an investigation.
Each area also recommends certain Agents. These Agents are marked with an “UP” indicator, making them useful choices for that specific exploration zone. Your Agent’s effectiveness inside the Hollow depends heavily on the equipment and items you bring rather than simply relying on their normal combat setup.
Map Features to Track During an Investigation
The map is more than a navigation tool because it helps you decide what to pursue before your investigation timer becomes a problem. You can track missions and Wishlist items while exploring, allowing you to focus on specific objectives instead of searching the entire area without a plan.
The map also displays Evacuation Anchors, which are essential when you are ready to leave the Hollow. Different Anchor types have different activation conditions, but all of them ultimately provide a safe route back to the Omond Research Station.
How Items Work in Enigma of the Labyrinth
Items collected inside the Hollow determine how well your Agent performs during an investigation. They can provide combat abilities, tactical effects, healing, or valuable resources that contribute to your overall progression.
The mode includes several types of collectible items and equipment. Some can be sold after an investigation, but you should generally keep materials because you need them for infrastructure upgrades and crafting.
| Item or System | Main Function | Important Detail |
|---|---|---|
| Supplies | Main exploration loot | Collected during Hollow investigations |
| Special Supplies | Valuable equipment | Can provide Alter Skills and combat bonuses |
| Tactical Items | Provide special effects | Occupy a dedicated tactical equipment slot |
| Valuables | Collectible items | Can provide Polychrome through Collections |
| Materials | Used for progression | Needed for Hub upgrades and crafting |
| Gear Coins | Mode-specific currency | Used for purchases and certain services |
| Support Supplies | Starting equipment | Provided at the beginning of an investigation |
| Equipment | Improves Agent performance | Determines the Agent's level and power inside the Hollow |
Item Rarity Matters
Higher-rarity items are harder to obtain and generally more valuable. The available item quality levels range from Green, Blue, Purple, Gold, and Red, with Red representing the highest quality listed for these collectibles.
This makes exploration worthwhile even after you have completed the immediate mission objective. Safes, containers, trucks, and other locations can hide valuable supplies, including Special Supplies.
Some containers are more difficult to open than ordinary ones. Electronic Strongboxes, for example, contain valuable supplies and require signal calibration to unlock. You must calibrate at the right moment to build progress and decrypt the key.
Special Supplies and Alter Skills
Special Supplies can directly change how your Agent fights inside the Hollow. Certain equipment grants Alter Skills that are added to the skill bar and can be used during combat.
One example is a blade-type Special Supply that can provide three Alter Skills:
Perfect Block
Phase Dash
Powerful Slash
These skills give the exploration system its own combat layer, rather than simply reproducing standard Agent gameplay.
The Hollow also uses an Alert Level system around enemies. Getting too close can cause enemies to detect your Agent, while some Alter Skills allow you to attack from behind before detection occurs.
That makes positioning important. A powerful Alter Skill is not necessarily useful if you trigger enemy detection before you can use it effectively.
Tactical Items Add Another Layer
Tactical Items provide additional abilities without replacing your main Agent equipment. You can equip one Tactical Item in its dedicated slot, giving you access to another useful effect during exploration.
For example, Etheric Phantom: Mutant Formicarrier provides a Stealth skill. Stealth can prevent enemy detection and help your Agent escape a dangerous encounter.
This makes Tactical Items useful when you want more control over exploration rather than relying entirely on direct combat.
Notorious Targets and High-Value Loot
Notorious Targets are special enemies that can appear when certain conditions are met. They function like miniboss threats and can make a loot-heavy investigation considerably more dangerous.
One notable example is The Hound, which is attracted to investigations carrying large amounts of valuable supplies. The more valuable your collected supplies become, the greater the chance of encountering it.
A Cacophony Shield protects the Hound while its shield is active, making it immune to attacks. You can instead focus on surviving, or use specific mechanics to break through its defenses.
A Perfect Assist can weaken the shield when the Hound attacks. A Perfect Block Alter Skill can also counter its attacks. Once the shield is destroyed, the Hound is temporarily knocked back, creating an opening for Powerful Slash.
This creates an important risk-versus-reward decision: carrying more valuable loot can make the investigation more profitable while also increasing the danger.
Evacuation Anchors Decide When You Keep Exploring
Reaching an Evacuation Anchor is the safest way to finish an investigation and return with your collected supplies. You normally have around 20 minutes to explore before you need to evacuate.
Waiting until the final moments can be risky because an Anchor has a short activation delay. If you begin the evacuation too late, the timer may run out before your Agent is safely transported back.
A practical approach is to start moving toward an Anchor once you have less than 10 minutes remaining, especially if you are carrying valuable supplies.
| Exploration Decision | Benefit | Risk or Consideration |
|---|---|---|
| Explore for more supplies | Increases potential rewards | Takes more time |
| Search safes and containers | Can reveal valuable items | May require extra exploration |
| Open Electronic Strongboxes | Can provide valuable supplies | Requires signal calibration |
| Carry high-value loot | Increases investigation value | Can attract The Hound |
| Use Alter Skills | Adds combat and movement options | Depends on collected equipment |
| Continue after finding an Anchor | Gives more time to collect loot | Increases evacuation risk |
| Evacuate early | Protects collected progress | Ends the current exploration sooner |
Materials Should Be Saved for Upgrades
Materials are more useful for progression than for immediate sales. After an investigation, you can store collected items or sell certain valuables, but you need materials to upgrade your Hubs and craft better equipment.
Hub upgrades can expand the amount of content available in the mode. The R&D Center, for example, can unlock a third Agent slot and provide Agent talents.
These talents can improve several parts of exploration, including starting shields, the number of Alter Skills available, storage capacity, and shop prices.
The Smart Workshop is another key part of progression because it lets you craft higher-level gear. Quick Restock helps when you lack materials, but it requires Gear Coins.
Blueprints can also be purchased from Boojee’s Store, giving you access to additional crafting options.
Collections Turn Exploration Into Long-Term Rewards
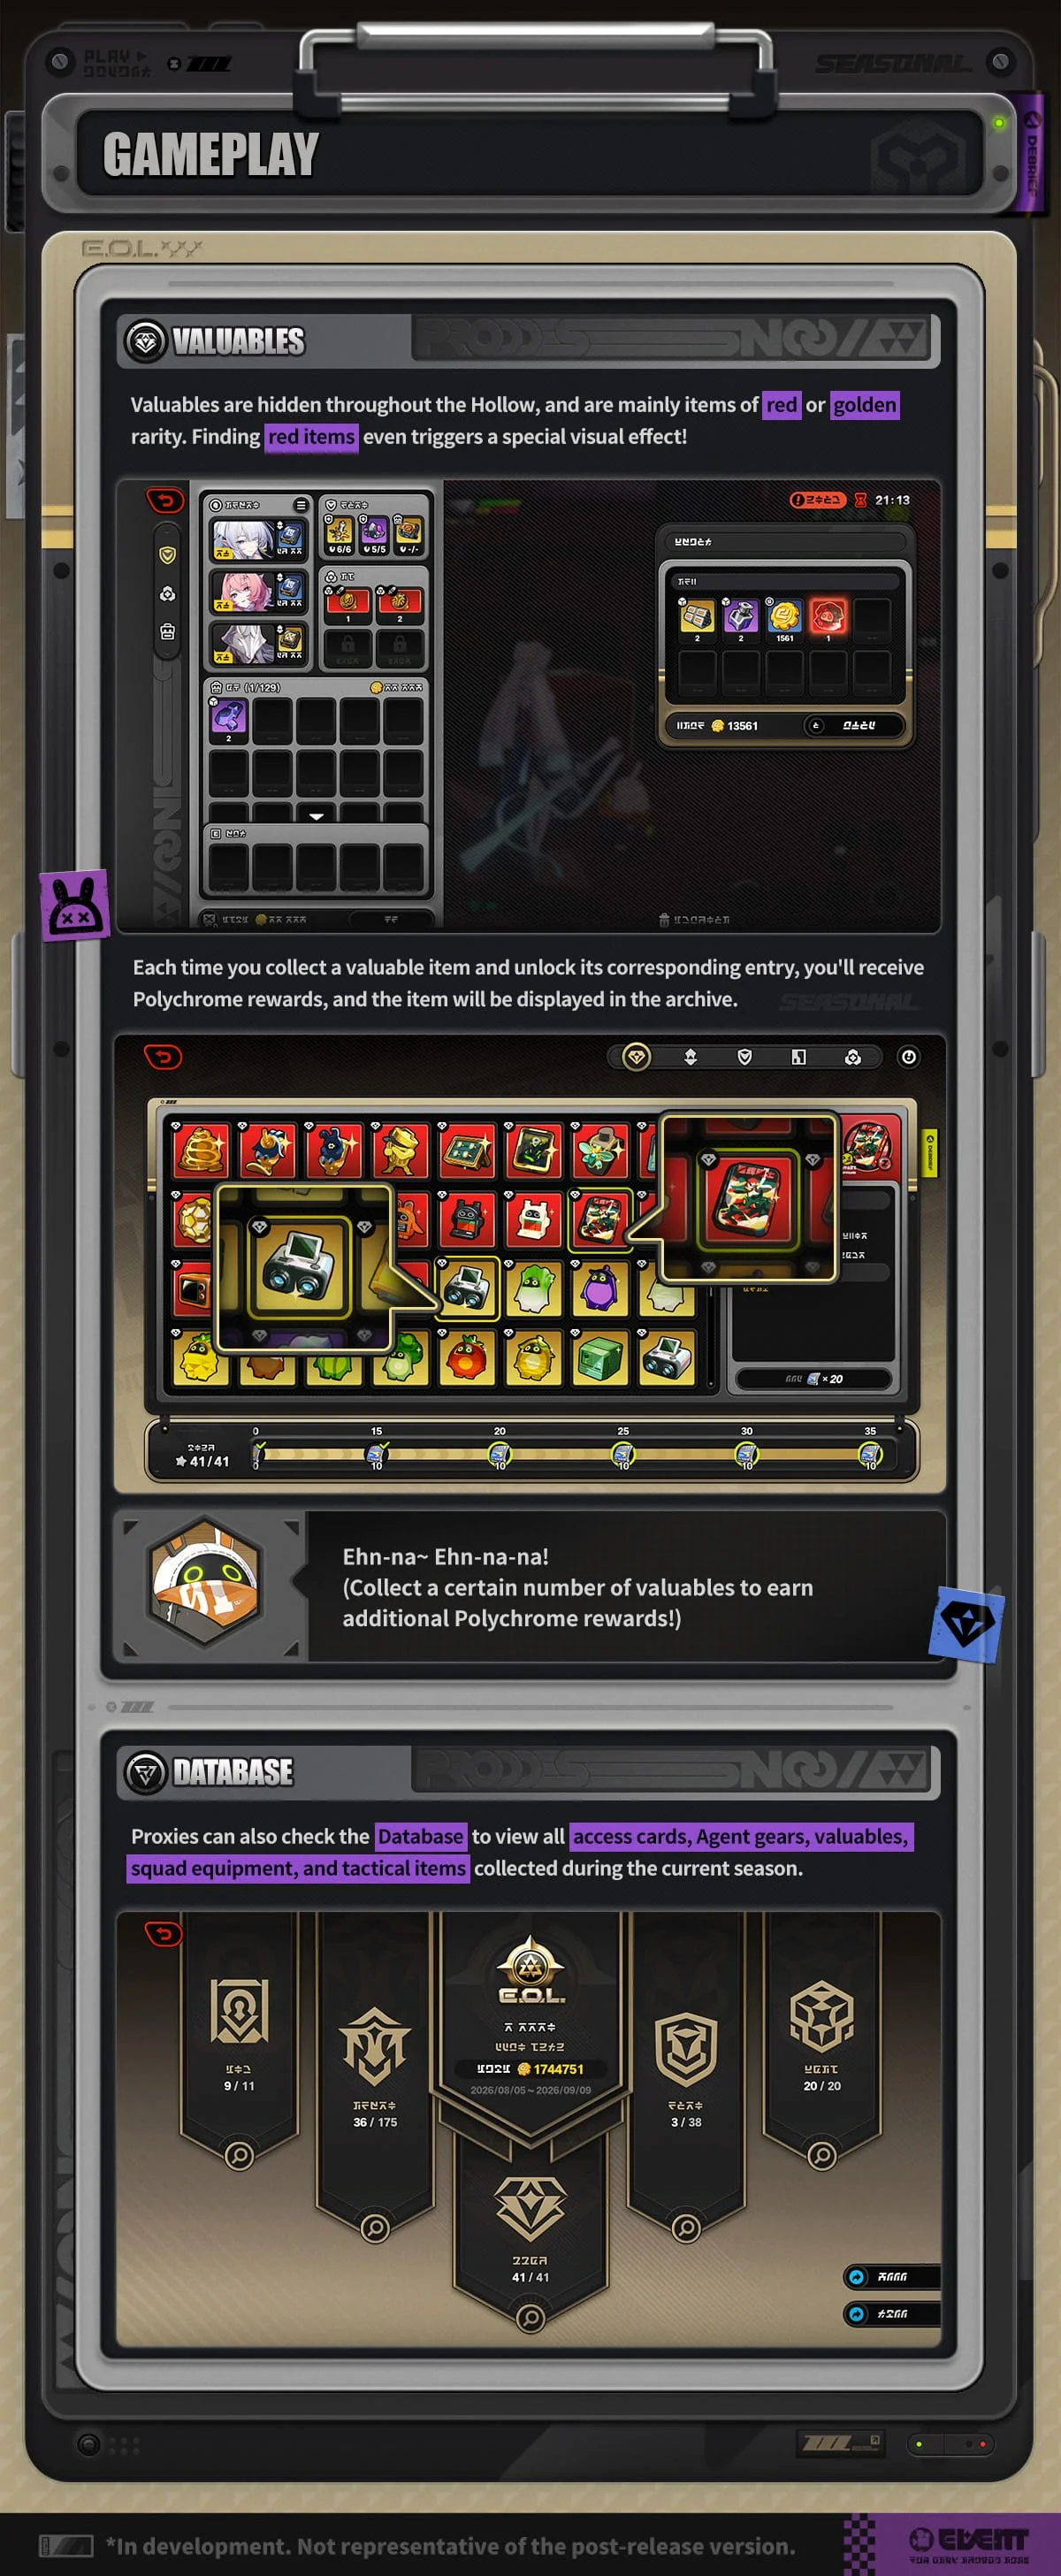
The Collections menu gives collected Valuables an additional purpose because registering them can provide Polychrome rewards. The amount of Polychrome varies by the item's rarity.
This means an item does not necessarily lose its value after you return from the Hollow. Collecting different Valuables can contribute to your long-term progression even when the item itself is not needed for crafting.
For players who also follow official game merchandise and collectibles, this broader collection-focused approach may feel familiar. At Animon Life, for example, official game merchandise is often treated as part of a wider collecting hobby rather than simply a one-time purchase.
Enigma of the Labyrinth Rewards
The mode offers both limited-period rewards and permanent rewards. During the initial event period, players can claim a set of rewards within 34 days, while other rewards remain obtainable through the permanent mode.
The limited-period reward pool includes 160 Polychromes, 6 Senior Investigator Logs, 6 W-Engine Energy Modules, 6 Bangboo System Widgets, and 140,000 Dennies.
Permanent rewards include 2,378 additional Polychromes, along with Senior Investigator Logs, W-Engine Energy Modules, Bangboo System Widgets, Original Chips, Dennies, and Gear Coins.
The mode also includes unique rewards such as two Pyrois Mindscapes, one Pyrois W-Engine overclock material, Proxy accessories, and the Dubi-Meow Headwear. These can be obtained through Boojee’s Store using Gear Coins earned during exploration.
Tips for Better Enigma of the Labyrinth Runs
1. Check the Map Before Moving
Use the map to decide what you want from the current investigation. Track a commission, Wishlist item, or evacuation point rather than wandering randomly through the Hollow.
2. Do Not Sell Materials Carelessly
Keep materials for Hub upgrades and crafting. Sell valuables and broken items when you need extra resources.
3. Watch Your Investigation Timer
Start planning your evacuation before the final minutes. An Anchor requires time to activate, so reaching one early is safer than gambling valuable supplies on another room.
4. Treat High-Value Loot as a Risk
More valuable supplies can increase the danger of an investigation. The Hound specifically reacts to high-value loot, so know when the additional reward is worth continuing the run.
5. Use Collections Regularly
Check the Collections menu after collecting new Valuables. Registering eligible items can provide Polychromes based on their rarity.
Short Summary
Enigma of the Labyrinth in Zenless Zone Zero Version 3.1 combines Hollow exploration, extraction, equipment management, and resource progression. The first Season features Suburbs Illusion and Janus Illusion, while maps help track missions, Wishlist targets, and evacuation points. Special Supplies provide Alter Skills, Tactical Items add extra abilities, and Notorious Targets such as The Hound create additional risks.
The biggest lesson is simple: collect what you need, protect valuable supplies, and leave the Hollow before the timer turns a successful run into a loss. The mode’s permanent progression also rewards players who invest materials into Hubs, crafting, Collections, and Boojee’s Store.
FAQs
Is Enigma of the Labyrinth permanent?
Yes. Enigma of the Labyrinth is a permanent game mode introduced in Version 3.1. Some initial rewards have a limited claim period, but the mode itself remains available.
What are the first Enigma of the Labyrinth areas?
The first Season includes Suburbs Illusion and Janus Illusion. Additional areas are scheduled to become available with later Seasons.
What happens if I run out of time in the Hollow?
You need to reach an Evacuation Anchor to return to the Omond Research Station safely. Unsecured items can be lost if the investigation ends unsuccessfully, although you can recover dropped items on a later visit.
What should I do with Gear Coins?
Gear Coins are used within the Enigma of the Labyrinth progression system, including purchases from Boojee’s Store. The store offers equipment, blueprints, and unique rewards such as Proxy accessories and Pyrois-related items.
Animon Life continues to follow and update official merchandise releases like this for North American customers.